
This tutorial will teach you how to add and edit any type of content to the site.
Before you can add anything, you will have to Log in. Once logged in, you can access all of the site’s features, including the Editing Mode. It is this mode that will allow you to add new content to the site. You will find this green link right next to the Game Overview tab.
![]()
It is important to note that ViGERP uses a two-step system for all its content. First you have to create a main Section, followed by a Sub-Section. All the main Sections will show up on the page, with the Sub-Sections being collapsible tabs within the main Sections. This will hopefully minimize the amount of visible tabs, thus keeping the pages easy to navigate.
Step 1: Creating a main Section
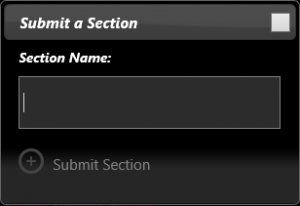
![]() Once you have entered the Editing Mode, you will notice a new purple bar. By clicking on this you will name a new Section. There is no real science to this. You can name this Section whatever you wish. Just remember that you still need to make a Sub-Section before you can start adding actual content. This means that if you are planning on adding a Clicker to The Last of Us, for instance, you should not call the main Section “Clicker”. Instead, you should call the main Section for “Enemies”, “Monsters” or “The Infected”, and then subsequently name the following Sub-Section “Clicker”.
Once you have entered the Editing Mode, you will notice a new purple bar. By clicking on this you will name a new Section. There is no real science to this. You can name this Section whatever you wish. Just remember that you still need to make a Sub-Section before you can start adding actual content. This means that if you are planning on adding a Clicker to The Last of Us, for instance, you should not call the main Section “Clicker”. Instead, you should call the main Section for “Enemies”, “Monsters” or “The Infected”, and then subsequently name the following Sub-Section “Clicker”.
Step 2: Creating a Sub-Section
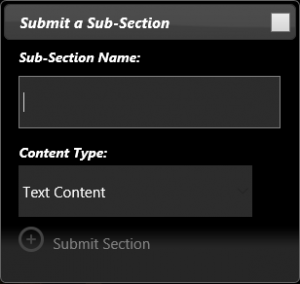
This is where you will create your actual content. The name of the Sub-Section is the main title of your document, so naming this one properly is very important. Using the above example, this would be named “Clicker”. Below the name, you will also notice a drop-down list. This is for the type of content you want to create. By default, this is set to “Text Content”. Text Content allows you the most freedom when creating your content, and the most text editor tools to play around with.
Step 3: Using the Text Content Editor
 As soon as you have named your Sub-Section, you will immediately be taken into the Text Content Editor, where you are now free to write your page document. This editor may look very basic, but you will quickly discover that it allows for some serious editing. While most of the features are very common to anyone who is used to writing in editor, we will go through every aspect in detail.
So, from left to right:
Backwards / Forwards
![]() If you make a mistake, you can use the Backwards button to go back to a previous draft. And, should you go too far back, you can use the Forward button to go.. well, forward. You will find that you will use these two buttons a lot. Especially once you start adding pictures and tables to your text.
If you make a mistake, you can use the Backwards button to go back to a previous draft. And, should you go too far back, you can use the Forward button to go.. well, forward. You will find that you will use these two buttons a lot. Especially once you start adding pictures and tables to your text.
Formats
![]() This button allows you to format your text quickly. By clicking on it, you will be presented with a lot of different choices, many of these are already available to you from the toolbar. However, let’s still go through them properly.
This button allows you to format your text quickly. By clicking on it, you will be presented with a lot of different choices, many of these are already available to you from the toolbar. However, let’s still go through them properly.
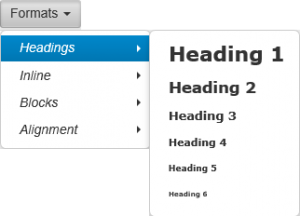 Headings
As the name implies, this allows you to change the styling of your headings in your document. Personally, I tend to stick with Heading 2, as I feel the others are either too big or too small. However, I encourage you to play around and find something that you like. As long as the text is easy to navigate and read, that is all that matters in the end.
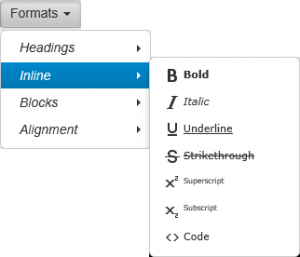 Inline
This is used to change the visual look of your text. While Bold and Italic are already available to you from the main text editor, there are some other nifty choices here. You will probably use Underline a few times, and you might even find some use for the others as well.
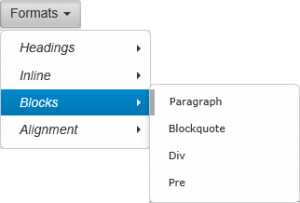 Blocks
Blocks are used to create breaks and separation in your text. This allows you to start a new paragraph with a small indent in the body of the text, for instance. Personally, I find it easier to not worry about using blocks. But again, you should use what you feel look best.
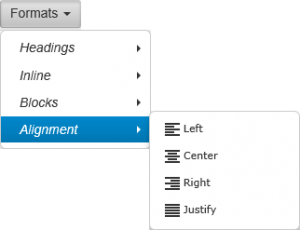 Alignment
The last option in the Formats is Alignment. All of these options are already available to you from the main text editor toolbar. Basically, if you want to use a terribly inefficient way of aligning your text to the right of the document, then this is the way to do it. Just ignore the Alignment tab completely.
Bold / Italic
![]() Just like the Inline option in the Formats tab, only a lot faster and easier.
Just like the Inline option in the Formats tab, only a lot faster and easier.
Alignments
![]() The quick and easy way to align your text, images and tables.
The quick and easy way to align your text, images and tables.
Lists
![]() If you need to create a list, you can use these two to get the desired results. The first is a simple bullet point list, while the second will create a numbered list. While they work very well by themselves, they do cause some problems if you try to use them in combination with images or more advanced style of editing. If you want to use images with your lists, I would recommend just creating your own list by using letters and numbers manually.
If you need to create a list, you can use these two to get the desired results. The first is a simple bullet point list, while the second will create a numbered list. While they work very well by themselves, they do cause some problems if you try to use them in combination with images or more advanced style of editing. If you want to use images with your lists, I would recommend just creating your own list by using letters and numbers manually.
Indents
![]()
If you ever want to move the start of your text either left or right, these two buttons make it very easy. You can also use these if you want to force an image, for instance, to a specific place. Just remember that forcing something to a specific spot might look good on a computer screen, but terrible on a mobile device. Personally, I would recommend leaving this one alone.
Links
![]()
These two buttons will allow you to input an URL to any webpage you want. Simply highlight the text you want to link to the webpage, click on the Insert/Edit Link button and paste the URL in the field when prompted. If you need to delete any links, simply place the marker inside the link you want to remove and click on the Remove Link button. This is most commonly used to create links to other pages within ViGERP, but can be used to also link to external webpages.
Images
![]() Any and all images can be uploaded into your text by using the Upload an Image button. Once uploaded, you can move the image around and format it simply by clicking on it and choosing the desired effect. For instance, you can select an image and then click on the Align Left button in the text toolbar. This will align the image to the left, and have the text wrap around it. By clicking on the Insert/Edit an Image button, you will see the image file location. By copying this location, you can place multiple copies of the image in your text, without having to re-upload your image.
Any and all images can be uploaded into your text by using the Upload an Image button. Once uploaded, you can move the image around and format it simply by clicking on it and choosing the desired effect. For instance, you can select an image and then click on the Align Left button in the text toolbar. This will align the image to the left, and have the text wrap around it. By clicking on the Insert/Edit an Image button, you will see the image file location. By copying this location, you can place multiple copies of the image in your text, without having to re-upload your image.
Preview
![]() If you want to have a look at your content before submitting, this is your friend.
If you want to have a look at your content before submitting, this is your friend.
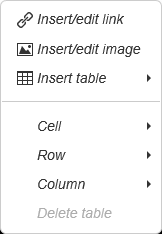
Hidden Functions
If you right-click anywhere within the text editor, it will open up an additional menu of hidden functions. Some of these have already been covered above, but there is one very important function hidden away here… Inserting Tables.
 Tables are crucial in order to make charts and lists. They are also highly adaptable to any situation, and you might find that you can use them for a lot more than just simple charts. You can, for instance, change the color of the background, font and border. You can combine cells together, split them apart and so much more. Below are some examples of how I have personally tweaked tables to achieve a desired look.

By making the border and the background black, they effectively disappear from view.

By merging cells and changing the background colors, it becomes easier to navigate big charts.
Step 5: Editing Content
The Editing Mode will also allow you to Edit any content already submitted to the site. Simply go to the page you want to edit, and you will notice a new Edit Content link in the top right corner of the header.

By clicking on that link, you will be taken to the Text Editor for that page, and you may now change anything as you see fit. This could be as simple as fixing a grammatical error, to rewriting the entire page.
As you can see, there is a lot of things that can be done within the text editor. I hope you have fun discovering everything you can do, and I am sure you will discover features and effects that I haven’t even thought of myself. The important thing is that you have fun adding content, and that you find it isn’t as difficult as it might seem at first. 🙂