
So, you have decided to take the first step towards helping the site grow.
Thanks! 🙂
Adding a new game to the database is the most important aspect of the site. It serves as a placeholder for all other contents to come. Think of it as the cover of a book. A book that is constantly being written and re-written by the community.
At first glance the Submit a Game page might seem overwhelming, but it is actually very simple. Once you get used to it, you will find that you will be able to add a new game in just a couple of seconds. All it takes is a little preparation. And, don’t worry if you don’t know all the facts. Most steps can be ignored, and either left blank or as “Unknown”. Someone else might know the answer and fill in the blanks later.
Step 1: Adding a main game image.
This is the actual image that will show up on the game’s detail page. By clicking the “Browse” button, it will open up your file manager, allowing you to select an image from your computer or mobile device. If you do not have an image ready, you can also skip this step. As for the image itself it should feature either the front of the game cover, the game media (disk, cartridge, floppy, etc.) or the in-game title screen – in that order.

Step 2: Adding the Game Title
Naturally every game featured on the site requires a title. This is the name of the game, pure and simple. It is important to note, however, that the specific type of release will be detailed in a later step. This means that title for both the Platinum Hits release and the Complete Edition release of Grand Theft Auto IV would simply be “Grand Theft Auto IV”.
Step 3: Naming the Series
If the game is part of a series, then simply write the name of the series here. In the above example, the series would be “Grand Theft Auto”.
Step 4: Declaring the Release Type
This is where you would add the specific release or version of the game. Examples would be “Collector’s Edition”, “Limited Edition”, “Platinum Hits” and so on. If it is just the standard release, then simply write “Standard”.
Step 5: Documenting the Release Date
Finding out the specific release date can be difficult for older games, as it is harder to locate accurate release information. Two good sources for accurate information are MobyGames and Wikipedia. To make your life easier, you can select “Unknown” for any or all three categories. The idea is to try to be as accurate as possible, so if all you know is the year it was released, then just leave it with that info.
Step 5: Placing the geographical Region
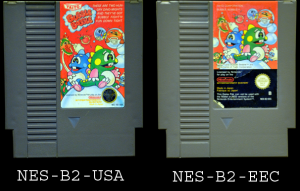
ViGERP is an international database, and every game deserves a spot. This field is used to differentiate between several international releases of the same game. For games that use actual region codes (like NTSC or PAL) you should just write down the code itself. In most other cases you should write the country or region the game was released, like “France” or “North-America”. The exception are games released by Nintendo. Nintendo prides themselves on being special, and so they use their own unique set of region codes. For these games, please write down the full region code.
Step 6: ESRB Rating
ESRB (Entertainment Software Rating Board) is responsible for rating video game content for the appropriate ages. Everyone involved with the creation and distribution of video games are legally obligated to follow these ratings. As such, ViGERP is no different. Every game should have a rating assigned to it. That being said, video games have been around longer than the ESRB have, and such a lot of older software won’t have a rating. This would apply to any game made before 1994. For all these games, simply put down “Everyone” as that was the original target audience.
 Step 7: Adding the UPC Number
UPC stands for Universal Product Code and is more commonly known as a barcode. Those vertical lines with numbers that cashiers all over the world scans at check-out. One important thing to note is that even though the numbers are spaced out across the barcode, they should be written down in a single unbroken chain. Using the pictured example, it would seem natural to write it as “0 19703 40412 1”. It should, however, be written as “019703404121”.
Step 8 & 9: Choosing the Genre(s) and Game Mode(s)
ViGERP divides a game’s style and mechanic into two groups. The genres represent the overall style, while the game modes represent the actual game mechanic. This is to try to make it less overwhelming to add a new game, and also make it easier to categorize games from different eras.
To use Final Fantasy as an example.
Everyone will agree that this is an RPG. However, some would call this a turn-based RPG, while others call any turn-based RPG from a Japanese developer a JRPG. And some would consider this a strategic JRPG. See how this is becoming more and more confusing? Which is the correct classification?
To (hopefully) make it easier for everyone, we use the above mentioned system. For this particular game the genres have been set as “Adventure”, “Fantasy”, “Roleplaying” and “Strategy”. This means that the game would show up for anyone looking for any of those genres. As for the game modes, this is where you would go more in-depth about the actual mechanic. You will notice that for Final Fantasy, the following has been used “Top-Down Perspective” and “Turn-Based”. This, when combined with the genres, allows the game to be classified as both a turn-based RPG, but also a turn-based strategy game.
This system also allows for shooters to be classified as first person view shooters (FPS), third-person shooters (TPS) and vertically scrolling shooters, for instance.
If you can’t find the one you are looking for, you can also add it to the database manually by clicking on the purple “Add it” link.
Step 10: Selecting the System(s)
This is where you select what system the game is played on. Please note that every single release gets it own dedicated page, meaning that even though a game was released both for Xbox One and Playstation 4, you should only put down the particular system that your game will run on. PC games (and a couple of older cartridge based games, like Atari), however, do run on multiple systems and for those you should input all of them.
Step 11: Selecting the Platform
Probably the easiest of all the steps. Simply select if the game is for an Arcade machine (as in coin-operated), Console (meaning it hooks up to a TV in order to work), Handheld (like a Game Boy or a mobile gaming device) or PC System (Windows, Mac or similar).
Step 12 & 13: Declaring the Developer(s) and Publisher(s)
Simply select the correct developers and publishers from the drop-down boxes. And just like with the Genre(s) and Game Mode(s), if you can’t find the one you are looking for, simply add it to the database.
Step 14: Writing down the Game Description
This is basically the text on the back of the game’s box. It is the official hook, line and sinker for the game. Some games have long and detailed stories on the back, while others have a bare minimum. Just write it down as you see it fit. 🙂
And that’s it.